Railway Deployment
One-click deploy to Railway
Railway offers an easy deployment experience for Kora nodes with automatic SSL, domain management, and built-in monitoring. This guide will walk through setting up a Kora node on railway with a simple Docker image and the Railway CLI.
Prerequisites
- Railway Account
- Railway CLI installed
- Solana CLI for private key creation
- Solana RPC Endpoint
Step 1: Prepare Deployment Files
Create a new directory for your Kora node:
mkdir my-kora-node
cd my-kora-node
Add the sample files to your directory:
Your directory should now look like:
my-kora-node/
├── kora.toml
├── signers.toml
└── Dockerfile
Step 2: Deploy to Railway
From your project directory, login to Railway
# Login to Railway
railway login
Follow the on-screen instructions to log in with your account.
Initialize Railway project in your directory.
railway initRailway will prompt you to:
- Create a new project or select existing
- Choose a project name (e.g., "my-kora-node")
Deploy Your Application
# Deploy the application
railway up
This will:
- Upload your files to Railway
- Build the Docker image
- Deploy your application
Expected output:
Build time: 121.81 seconds
Deploy complete
Starting Container
Great! We are all set up! You will probably notice an error in your logs ("error: a value is required for --rpc-url <RPC_URL> but none was supplied
"). This is because we have not yet configured our environment variables--so let's do that next.
Step 3: Configure Environment Variables
Open your Railway dashboard at railway.app and navigate to your project. In your project, click "Settings" > "Variables"
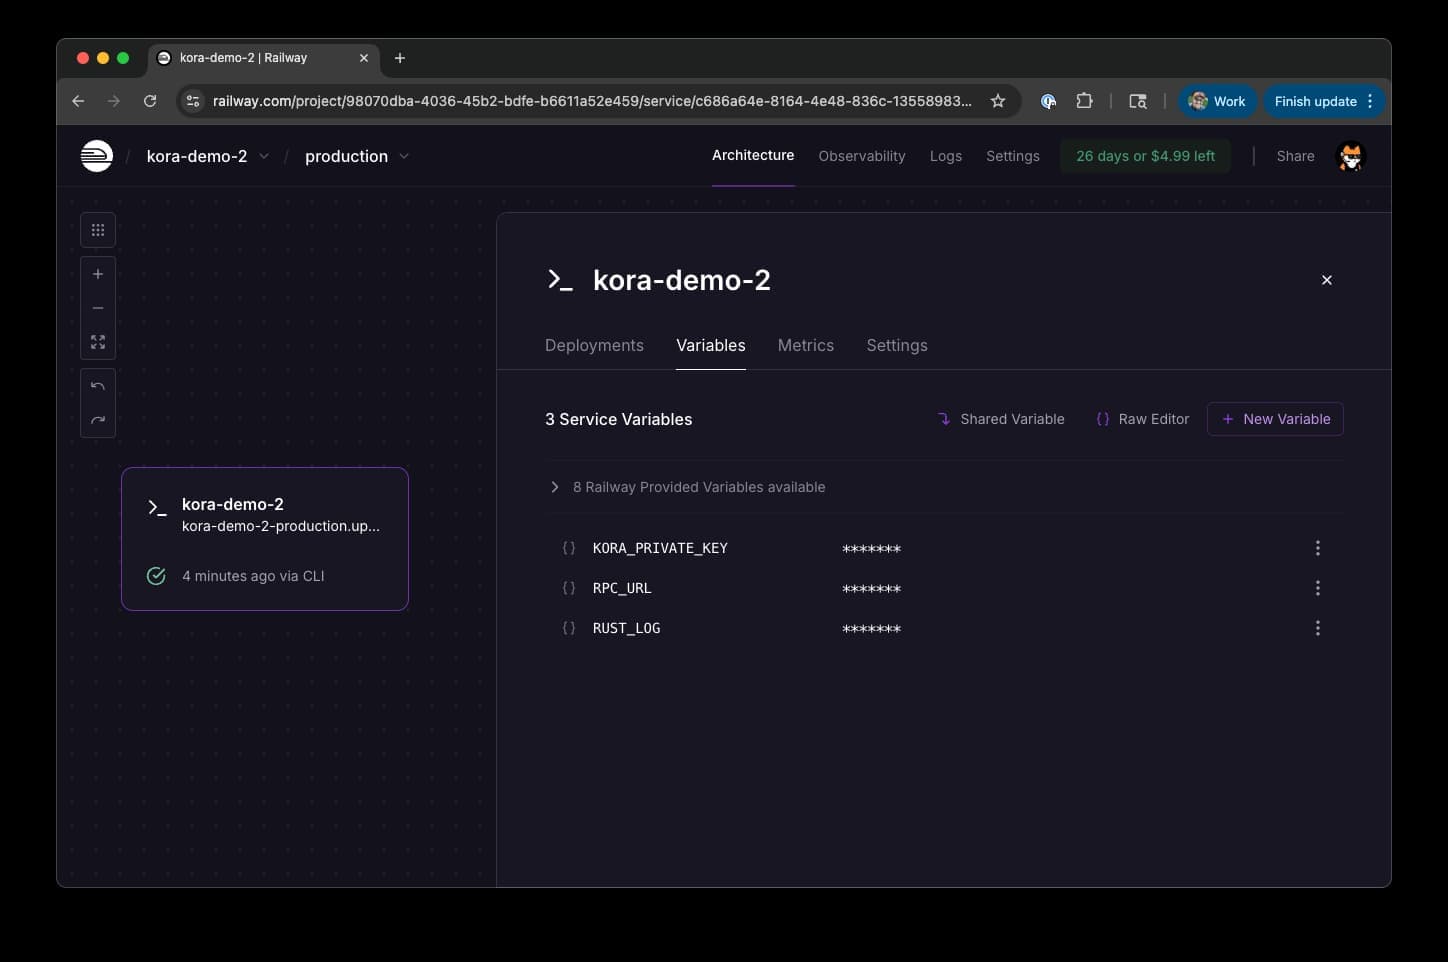
Add these environment variables:
| Variable | Value | Description |
|---|---|---|
RPC_URL | https://api.mainnet-beta.solana.com | Solana RPC endpoint |
KORA_PRIVATE_KEY | your-base58-private-key | Your Solana private key (base58 format) |
RUST_LOG | info | Log level for debugging |
Security Warning: Your private key has access to SOL for paying fees. Use a dedicated keypair for your Kora node and only fund it with the SOL you're willing to spend on transaction fees. For more information on signers, see the Signers Guide.
Getting Your Private Key
If you need to create a new keypair:
# Generate new keypair
solana-keygen new --outfile ~/.config/solana/kora-keypair.json
Make sure to deposit adequate SOL for testing/operator your node.
Step 4: Redeploy
After saving your variables, you will be prompted to redeploy your server--do that.
Step 5: Test Your Deployment
Generate Public Endpoint
To send requests to your endpoint, you will need to generate a public Domain. From your deployment, go to "Settings" > "Generate domain".
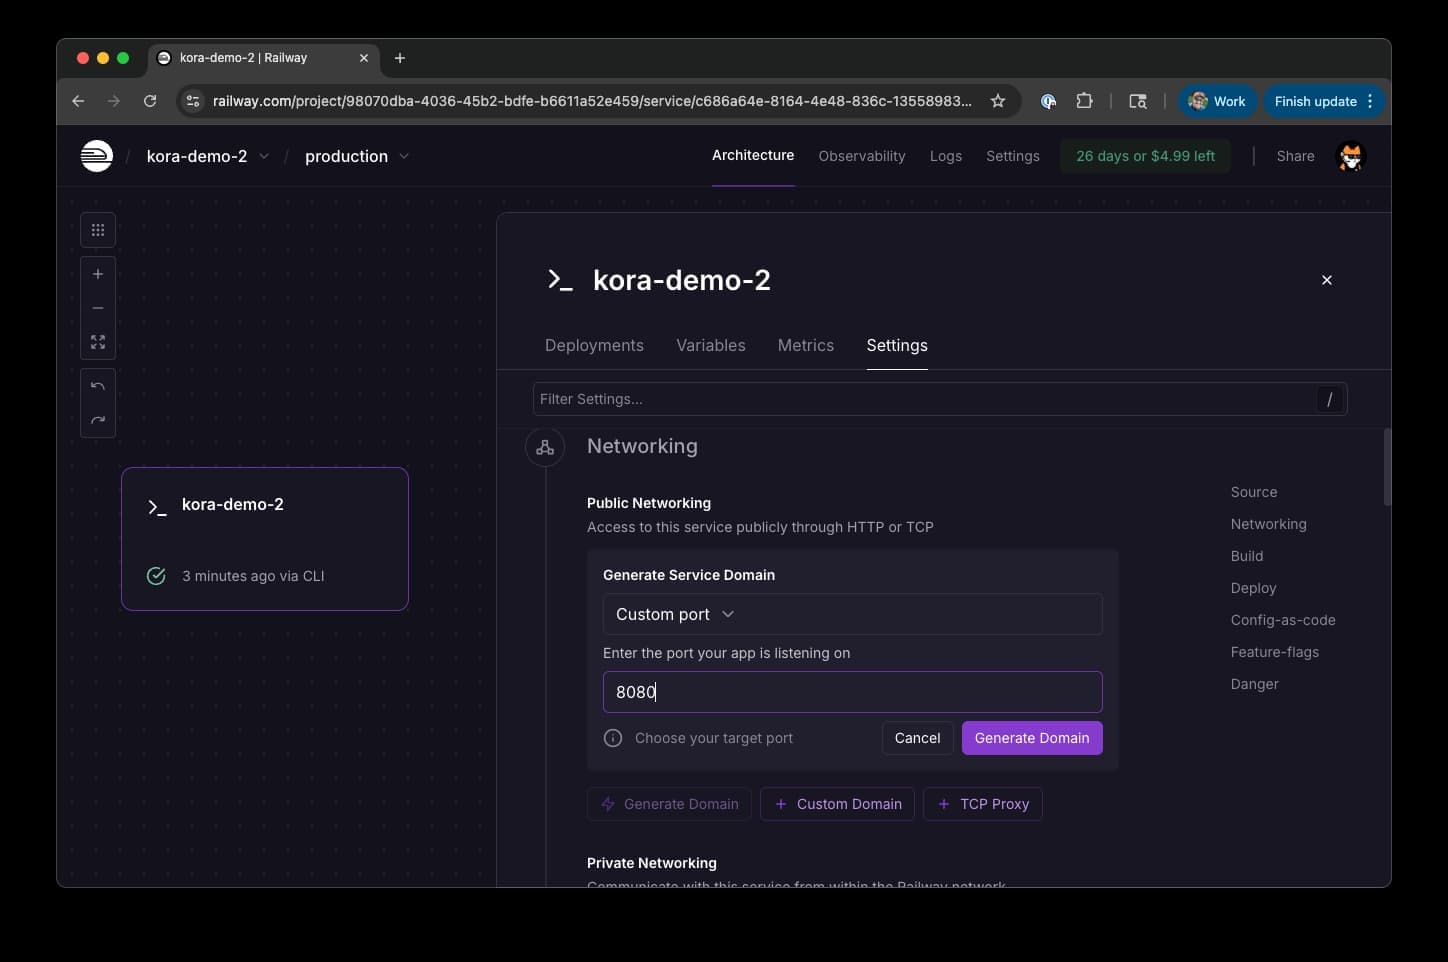
Use the default port, "8080" and click "Generate Domain".
You should get a domain like https://my-kora-node.railway.app/
Test Configuration Endpoint
curl -X POST https://my-kora-node.railway.app \
  -H "Content-Type: application/json" \
  -d '{"jsonrpc":"2.0","id":1,"method":"getConfig","params":[]}' | jq
Expected response:
{
  "jsonrpc": "2.0",
  "id": 1,
  "result": {
    "fee_payer": "YourPublicKeyHere...",
    "validation_config": {
      "max_allowed_lamports": 1000000,
      "allowed_programs": [...],
      "allowed_spl_paid_tokens": [...]
      // ...
    }
  }
}
Nice job! Your Kora node is now live.
Need Help?
- Kora Node Operators Guide - Common issues and solutions
- Railway Documentation - Platform-specific help
- GitHub Issues - Report bugs or get support
- Solana Stack Exchange - Ask questions/share learnings (make sure to use the
koratag)